This week, I’ve been making some changes to Rads & Relics, to make the underlying engine more flexible. Specifically, I’ve been rebuilding everything using a Model-View-Controller (MVC) pattern. Today, I wanted to share my experience with the changes and some tips for people looking to do the same.
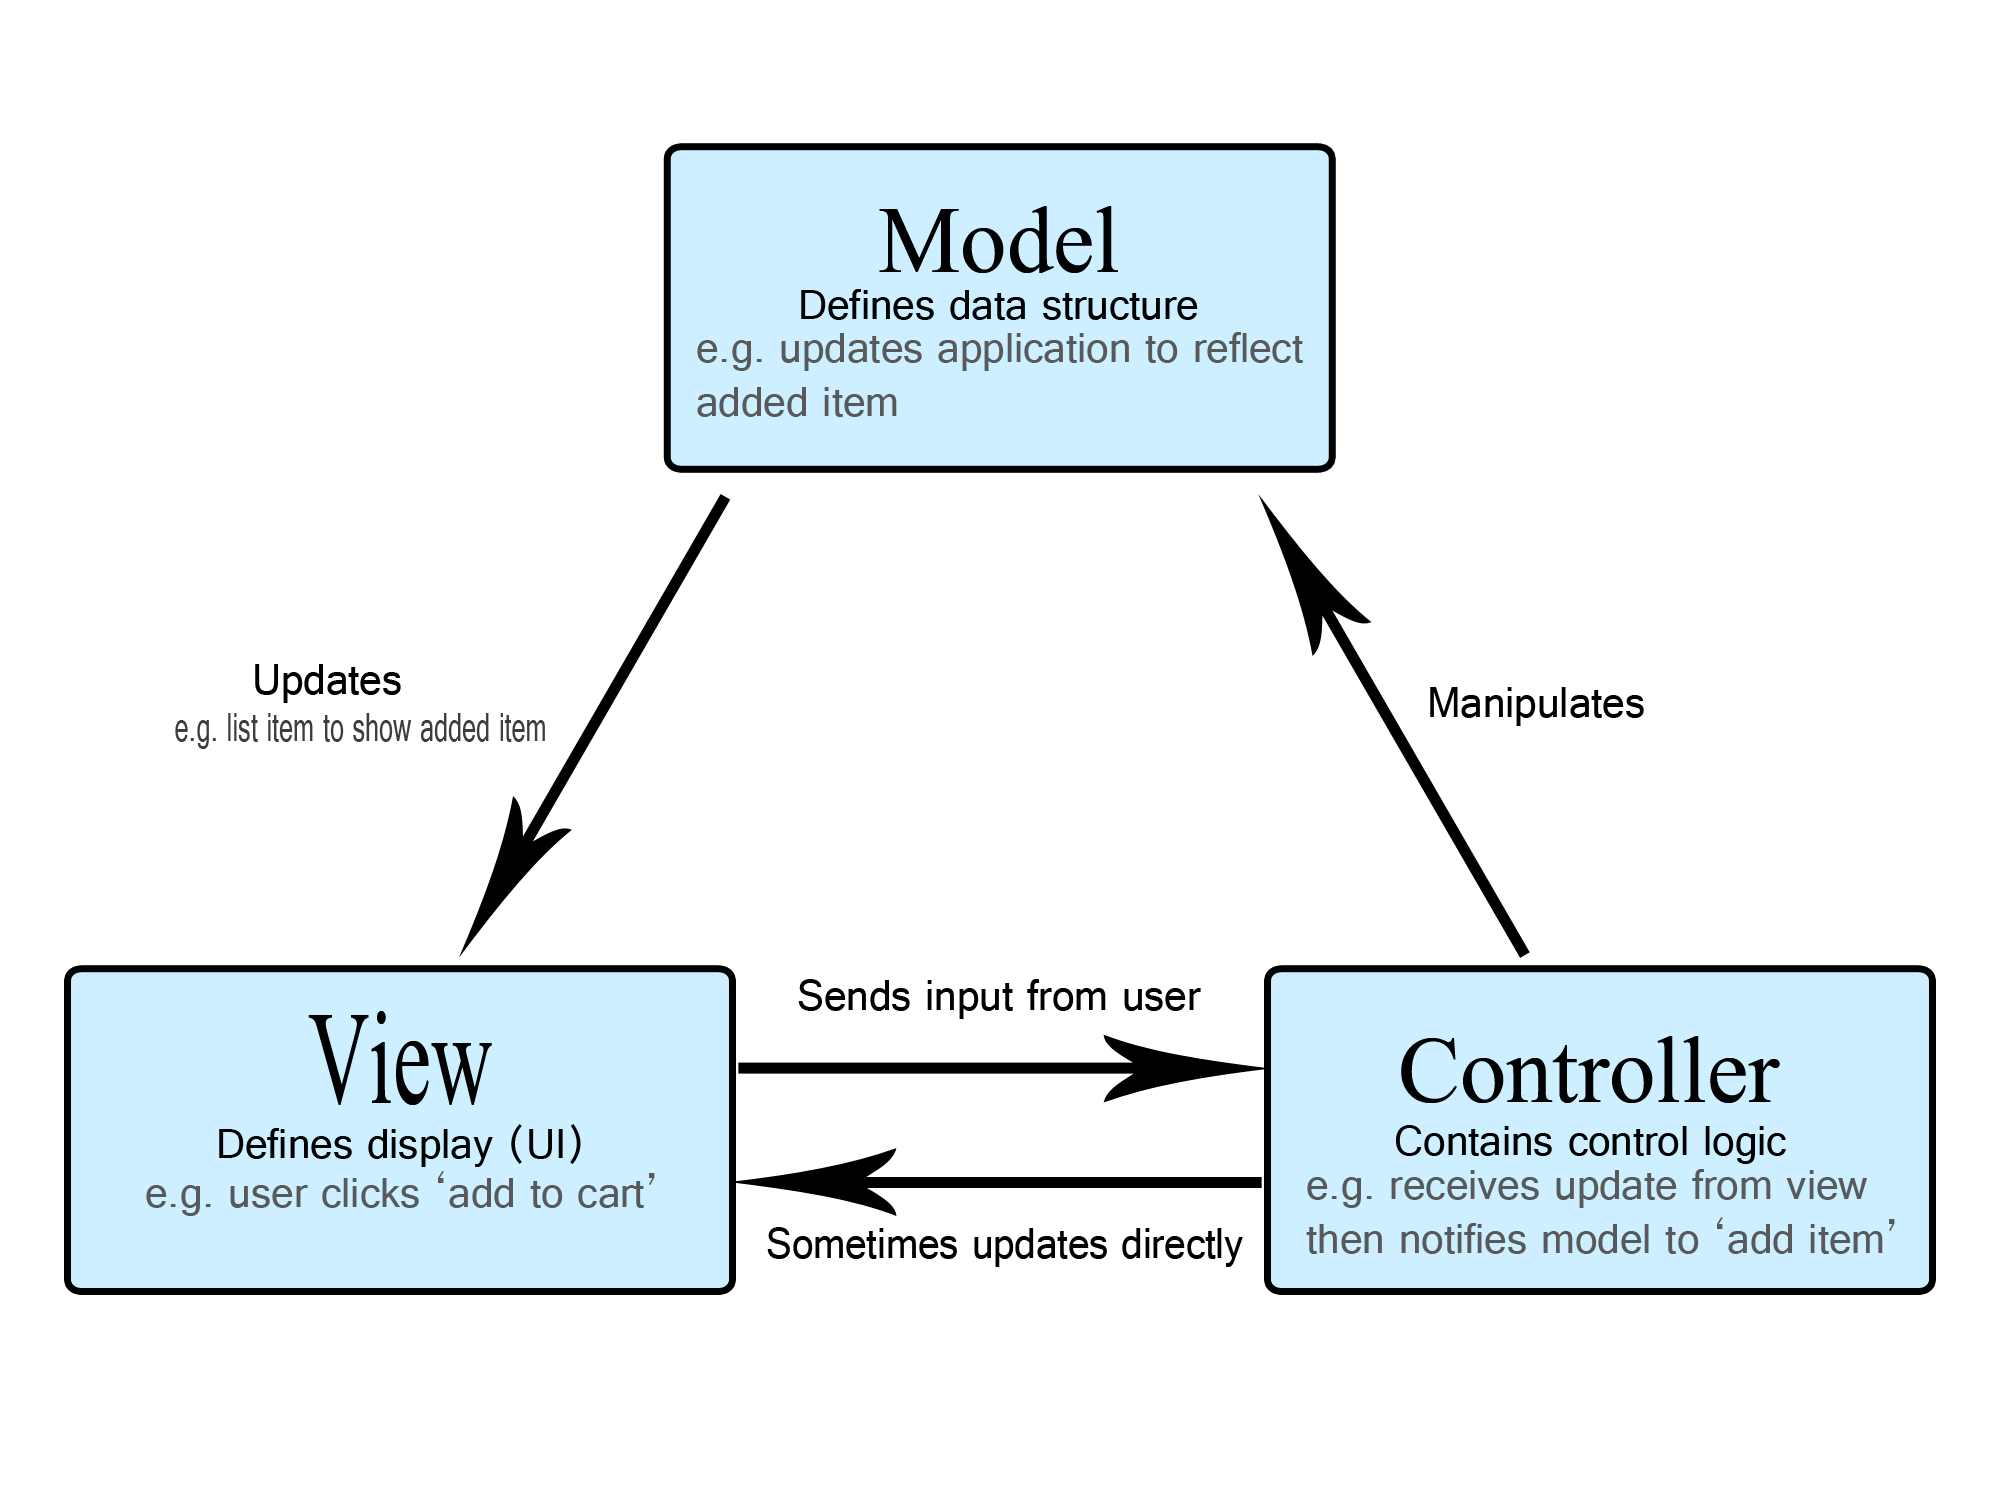
First of all, why use the MVC pattern? Since Rads & Relics is a turn-based game, the core game can be understood as a series of actions carried out on a game state. Previously, this game state and the actions were spread across the components that were also displaying the game (i.e., in the Node2Ds and Sprites that represent units, the map, etc.). This was tough to manage and led to tangled logic.
Because of this, I’ve been moving to a new model. All of the game data should live in a model, while the display logic should just present that data visually (I won’t be discussing the controller in depth today, but in our setup it will likely handle inputs, turn progression, and dispatching actions to modify the model). In Godot, I am accomplishing this by setting up the model in Resources and the views in various Node objects.
For the rest of this article, let’s take a simple example. We want each unit on the battlefield to have a health value. Within the new paradigm, we would create a new Resource to represent the unit model.
# UnitData.gd
class_name UnitData

@export var health: int = 0
Resources have a couple of nice properties. First, they have built-in serialization/deserialization. This will allow us to save/load the game state without having to write our own serialization logic. Secondly, they show up natively in the Godot editor, making it easier for us to tweak values at run time.
As I’ve been building these models, I’ve also discovered that, while Resource has a changed signal, it does not fire that signal when a custom property has changed (documentation). I want to use this signal to update the UI, so all of my resources have included custom setters that will fire the changed signal.
# UnitData.gd
class_name UnitData

@export var health: int = 0:
	set(value):
		health = value
		changed.emit()
The other side of this is the view. Here we would want to react to the value being changed and update our Node.
# Unit.gd

@onready var health = $Health

@export var unit_data: UnitData:
	set(value):
		unit_data = value
		unit_data.changed.connect(_update_health_display)

func _ready():
	_update_health_display()

func _update_health_display():
	if health:
		health.text = unit_data.health
A couple of things to call out here:
- We use a setter again to listen to any changes on the unit data.
- We have to call
_update_health_displayin_ready()once we’ve initialized all of our child nodes. - This pattern makes it much easier to later add animations or effects when health changes—just hook into the same signal.
This works well, but has one drawback, which is that if you run this Node in the editor it will be empty. We can fix this by using @tool scripts. These allow the scripts to be run in the editor as well as in game. By adding @tool to both of our scripts, we can now update the health and see it reflected back instantly.
State of the Game
- Progress this week
- MVC overhaul of campaign and battle data
- Better UI for playing cards
- Coming Up
- Begin to integrate characters from Make-a-character March
- Add more useful cards to card system